
 Discover the secret to achieving clear, radiant skin with the revolutionary Oil Cleansing Method. This all-natural skincare technique has been gaining popularity among beauty enthusiasts for its ability to deeply cleanse and nourish the skin, leaving it looking fresh and rejuvenated. Unlike traditional cleansers that strip away the skin's natural oils, the Oil Cleansing Method works by using a combination of carefully selected oils to dissolve dirt, makeup, and impurities without disrupting the skin's delicate balance. By harnessing the power of plant-based oils, this method effectively removes build-up and unclogs pores, leading to a clearer complexion. Not only does the Oil Cleansing Method provide an effective way to cleanse the skin, but it also offers a multitude of additional benefits. The oils used in this method are rich in antioxidants and essential fatty acids which promote hydration, reduce inflammation, and support skin health. This versatile cleansing technique is suitable for all skin types and can be tailored to address specific concerns such as acne, dryness, or aging. Get rid of harsh cleansers that leave your skin feeling tight and dry. Try the Oil Cleansing Method today and experience the transformative power of natural skincare. HOW DOES THE OIL CLEANSING METHOD WORK?The Oil Cleansing Method works on the principle that "like dissolves like." By using oils to cleanse the skin, the method effectively dissolves and removes oil-based impurities such as dirt, makeup, and excess sebum, while leaving the skin's natural protective barrier intact. When the oil cleanser is massaged onto the skin, it binds to the dirt and impurities, breaking them down and lifting them away. The oil also helps to dissolve hardened sebum, which can clog pores and lead to acne. Once the impurities are loosened, they can be easily rinsed away, leaving the skin clean and refreshed. Additionally, the Oil Cleansing Method helps to balance the skin's oil production. When harsh cleansers strip away the skin's natural oils, the skin compensates by producing more oil, leading to oiliness and breakouts. By using oils to cleanse the skin, the method helps to regulate the skin's oil production, leading to a more balanced complexion. BENEFITS OF OIL CLEANSINGDeep Cleansing: The Oil Cleansing Method provides a deep cleanse that removes dirt, makeup, and impurities without stripping the skin's natural oils. This helps to prevent clogged pores, breakouts, and dullness, resulting in a clearer and more radiant complexion. Gentle and Nourishing: Unlike harsh cleansers that can disrupt the skin's barrier and cause irritation, the Oil Cleansing Method is gentle and nourishing. The plant-based oils used in this method are rich in antioxidants and essential fatty acids, which help to hydrate and nourish the skin, leaving it soft, supple, and healthy. Suitable for All Skin Types: The Oil Cleansing Method is suitable for all skin types, including oily, dry, sensitive, and combination skin. By selecting the right oils for your specific skin type, you can tailor the method to address your individual skincare needs. Customizable: One of the great advantages of the Oil Cleansing Method is its versatility. You can customize the blend of oils used based on your skin's needs and concerns. For example, if you have acne-prone skin, you can incorporate oils with antibacterial properties, while those with dry skin can opt for more hydrating oils. Cost-effective: The Oil Cleansing Method can be a cost-effective skincare solution. Instead of investing in multiple cleansers, toners, and makeup removers, you can simplify your skincare routine by using a few key oils that serve multiple purposes. CHOOSING THE RIGHT OIL FOR YOUR SKIN TYPESelecting the right oils for your skin type is crucial to ensure the effectiveness of the Oil Cleansing Method. Different oils have different properties and can target specific skin concerns. Here are some common oils and their benefits for each skin type: Oily Skin: Oily skin types benefit from oils that have a lighter texture and a balancing effect. Some suitable oils include jojoba oil and grape seed oil. These oils help to regulate oil production and prevent clogged pores without leaving a greasy residue. Dry Skin: Dry skin types benefit from oils that provide deep hydration and nourishment. Oils such as argan oil, and rose hip seed oil are rich in fatty acids and antioxidants, which help to replenish moisture and improve skin elasticity. Sensitive Skin: Sensitive skin types require gentle and soothing oils that won't irritate or cause redness. Oils like squalane oil, and evening primrose oil have calming properties and can help to reduce inflammation and sensitivity. Combination Skin: Combination skin types can benefit from a combination of oils that target different areas of the face. For example, using a lighter oil like jojoba oil on the T-zone and a more nourishing oil like rosehip oil on the cheeks can help to balance the skin and address different concerns. STEP-BY-STEP GUIDE TO OIL CLEANSING1. Choose your oils: Based on your skin type and concerns, select a blend of oils that will work best for you. You can start with a simple blend of two oils and adjust as needed. You can also purchase an oil cleanser specifically formulated for your skin type if need be. 2. Prepare your skin: Before applying the oil cleanser, remove any heavy makeup or sunscreen with a gentle micellar water. This helps to prepare the skin's surface for deep cleansing. 3. Apply the oil cleanser: Take a small amount of the oil cleanser in your hands and gently massage it onto your face using circular motions. Focus on areas that tend to be oilier or have more impurities. Take your time to thoroughly massage the oil cleanser into your skin. 4. Steam and relax: After massaging the oil cleanser onto your skin, take a clean washcloth and soak it in warm water. Wring out the excess water and place the warm washcloth on your face. This creates a steam effect that helps to further open the pores and allows the oils to penetrate deeply. 5. Remove the oil cleanser: Gently wipe away the oil cleanser using the warm washcloth. Rinse the washcloth and repeat this step until all traces of the oil cleanser are removed. 6. Follow with a toner (optional): After using the oil cleanser, you can follow up with a gentle toner to further balance and hydrate the skin. Look for a toner that is alcohol-free and contains soothing ingredients like rose water or Centella Asiatica . TIPS FOR SUCCESSFUL OIL CLEANSINGStart slow: If you're new to the Oil Cleansing Method, it's best to start with a small amount of oil cleanser and gradually increase as needed. This allows your skin to adjust to the method and prevents potential breakouts or reactions. Be patient: The Oil Cleansing Method may take some time for your skin to adjust and show visible results. Give your skin at least a few weeks to adapt to the new cleansing routine and don't be discouraged if you don't see instant changes. Experiment with oils: Finding the perfect blend of oils for your skin may require some trial and error. Don't be afraid to experiment with different oils and ratios to find what works best for you. COMMON MISTAKES TO AVOID WHEN OIL CLEANSING 1. Using comedogenic oils: Some oils have a higher likelihood of clogging pores and causing breakouts. Avoid using oils with a high comedogenic rating, such as coconut oil or olive oil, if you have acne-prone skin. 2. Over-cleansing: While the Oil Cleansing Method effectively removes dirt and impurities, overdoing it can disrupt the skin's natural balance. Stick to cleansing once or twice a day to avoid stripping the skin of its natural oils. 3. Skipping the steaming step: The steaming step is essential for opening the pores and allowing the oils to penetrate deeply. Skipping this step may result in less effective cleansing. FAQs ABOUT OIL CLEANSING Will the oil cleanser make my skin feel greasy?: No, when used properly, the oil cleanser should not leave a greasy residue on the skin. The oils used in the Oil Cleansing Method are easily absorbed and leave the skin feeling clean and nourished. Can I use the oil cleanser to remove eye makeup?: Yes, the oil cleanser can effectively remove eye makeup. Take a small amount of the oil cleanser and gently massage it onto the eyelids and lashes to dissolve the makeup. Be careful not to get the cleanser into your eyes. Can I use the oil cleansing method if I have acne?: Yes, the Oil Cleansing Method can be beneficial for acne-prone skin. By using oils with antibacterial properties, you can help to reduce acne-causing bacteria and prevent breakouts. However, it's important to choose non-comedogenic oils to avoid clogging pores. WAYS TO COMPLEMENT THE OIL CLEANSING METHOD Double Cleansing: Double cleansing involves using an oil cleanser followed by a water-based cleanser to ensure a thorough cleanse. This method is particularly useful for removing heavy makeup or sunscreen. Exfoliation: Regular exfoliation helps to remove dead skin cells and promote cell turnover, resulting in a brighter complexion. You can incorporate physical exfoliation with a gentle scrub or chemical exfoliation with ingredients like alpha-hydroxy acids (AHAs) or beta-hydroxy acids (BHAs). Face Masks: Face masks are a great way to nourish and treat the skin. Look for masks with ingredients like clay to draw out impurities, honey to hydrate and soothe, or antioxidants to protect against environmental damage. FINAL THOUGHTS The Oil Cleansing Method offers a natural and effective way to achieve clear, radiant skin. By harnessing the power of plant-based oils, this method gently cleanses and nourishes the skin, leaving it looking fresh, rejuvenated, and healthy. With its multiple benefits and versatility, the Oil Cleansing Method is suitable for all skin types and can be customized to address specific skincare concerns.
Say goodbye to harsh cleansers that strip away your skin's natural oils and try the Oil Cleansing Method today. Experience the transformative power of this all-natural skincare technique and enjoy the clear, radiant complexion you've always wanted.  Tired of dealing with dark under-eye circles and puffiness? It's time to revitalize your under-eye skin and boost radiance with the help of eye patches. These handy little skincare wonders have grown increasingly popular in recent years, and for good reason. By simply applying the patches to your under-eye area, you can enjoy a range of benefits, from reducing puffiness and minimizing the appearance of fine lines to brightening dark circles and deeply hydrating the delicate skin. But not all eye patches are created equal. That's why it's important to choose high-quality products that deliver real results. Whether you prefer hydra-gel patches, collagen-infused options, or ones packed with potent ingredients like retinol and hyaluronic acid, there's a wide range of choices available to address your specific concerns. Don't let tired-looking eyes hold you back from radiating confidence. Try them today and discover the transformative power of eye patches. Give your under-eye skin the pampering it deserves and let your radiance shine through. HOW DO EYE PATCHES WORK?Eye patches work by delivering targeted ingredients to the under-eye area, helping to address specific skincare concerns. They basically serve as a quick fix to those pesky skin concerns, and give the under eye area a much needed boost. Most eye patches are made from hydra-gel, a gel-like material that adheres to the skin, allowing the active ingredients to penetrate deeply. The hydra-gel also creates a barrier that helps to lock in moisture, providing a plumping effect and reducing the appearance of fine lines and wrinkles. Eye patches are designed to be worn for a specific amount of time, typically around 5-20 minutes, allowing the ingredients to work their magic. During this time, the patches cool and soothe the delicate under-eye area, reducing puffiness and inflammation. The patches also help to improve the skin's elasticity and firmness, resulting in a more youthful and rejuvenated appearance. THE BENEFITS OF EYE PATCHESUsing eye patches regularly can provide a range of benefits for your under-eye skin. Here are some of the key benefits you can expect: Reduced puffiness: Eye patches, especially those infused with cooling ingredients like cucumber extract or aloe vera, can significantly reduce puffiness around the eyes and decrease fluid retention. Ingredients like caffeine help to constrict blood vessels and also reduce puffiness, leaving your under-eye area looking refreshed and revitalized. Minimized fine lines and wrinkles: Eye patches containing ingredients like retinol and peptides can help to stimulate collagen production and improve skin elasticity. Regular use of these patches can minimize the appearance of fine lines and wrinkles, giving your under-eye area a smoother, more youthful and snatched look. Brightened dark circles: Dark circles under the eyes can be caused by various factors, including genetics, lack of sleep, and aging. Eye patches infused with brightening ingredients like vitamin C or niacinamide can help to lighten dark circles and even out the skin tone, giving you a brighter and more awake appearance. Deep hydration: The delicate skin under the eyes is prone to dryness, which can make fine lines and wrinkles more prominent. Eye patches that contain hydrating ingredients like hyaluronic acid or ceramides provide intense moisture to the under-eye area, plumping up the skin and reducing the signs of dehydration. KEY INGREDIENTS COMMONLY FOUND IN EYE PATCHES Eye patches come in a variety of formulations, each containing different active ingredients that target specific skincare concerns. Here are some key ingredients commonly found in eye patches and their effects: Retinol: Retinol is a powerful ingredient known for its anti-aging properties. It helps to stimulate collagen production, reduce the appearance of fine lines and wrinkles, and improve skin texture and tone. Hyaluronic acid: Hyaluronic acid is a hydrating powerhouse that can hold up to 1000 times its weight in water. It deeply hydrates the skin, plumping up fine lines and wrinkles, and giving the under-eye area a smoother and more youthful appearance. Caffeine: Caffeine is a popular ingredient in eye patches due to its ability to constrict blood vessels and reduce puffiness. It also has antioxidant properties that help to protect the skin from environmental damage. Peptides: Peptides are short chains of amino acids that help to stimulate collagen production and improve skin elasticity. They can minimize the appearance of fine lines and wrinkles, giving the under-eye area a firmer and more lifted look. Vitamin C: Vitamin C is a brightening ingredient that helps to even out the skin tone and fade dark spots. It also boosts collagen production, and has antioxidant properties that protect the skin from free radical damage. CHOOSING THE RIGHT EYE PATCHES FOR YOUR SKIN TYPEWhen choosing eye patches, it's important to consider your skin type and specific concerns. Here are some tips to help you find the right patches for your needs: Dry skin: If you have dry under-eye skin, look for patches that are formulated with hydrating ingredients like hyaluronic acid or ceramides. These ingredients will provide intense moisture and help to plump up the skin. Sensitive skin: If you have sensitive skin, opt for eye patches that are free from fragrance and harsh chemicals. Look for patches that are formulated with soothing ingredients like Centella Asiatica to minimize the risk of irritation. Mature skin: If you have mature skin, choose eye patches that contain anti-aging ingredients like retinol or peptides. These ingredients will help to stimulate collagen production and minimize the appearance of fine lines and wrinkles. Dark circles: If you have dark circles under your eyes, look for eye patches that are infused with brightening ingredients like vitamin C, niacinamide, alpha-arbutin or kojic acid. These ingredients will help to lighten dark circles and even out the skin tone. Puffiness: If you struggle with puffiness, opt for eye patches that contain ingredients like caffeine or cucumber extract. These ingredients have a cooling effect and can constrict blood vessels, reducing puffiness and inflammation. Remember to always patch test new products before applying them to your under-eye area to avoid any potential allergic reactions or irritation. ADDING EYE PATCHES TO YOUR SKINCARE ROUTINETo get the most out of your eye patches, it's important to incorporate them into your skincare routine correctly. Here are some tips to help you maximize their benefits: Cleanse: Start by cleansing your face and removing any makeup or impurities from the under-eye area. This will ensure that the patches adhere properly and allow the active ingredients to penetrate the skin effectively. Apply the patches: Gently remove the patches from the packaging and place them under your eyes, ensuring they cover the entire under-eye area. Smooth out any wrinkles or air bubbles to ensure proper adhesion. Relax and enjoy: Set a timer for the recommended amount of time and relax while the patches work their magic. Take this time to do something for yourself, like reading a book or meditating. Remove and massage: After the recommended time, gently remove the patches and discard them. Gently massage any remaining serum into the skin using your ring finger, tapping lightly to promote absorption. Follow up with skincare: After using eye patches, follow up with the rest of your skincare routine. Apply your favorite eye cream or serum to further nourish and protect the delicate under-eye area. TIPS TO ENHANCE THE BENEFITS OF EYE PATCHES Here are some additional tips to help you get the most out of your eye patches: Store them properly: Eye patches are typically packed with potent ingredients, so it's important to store them properly to maintain their effectiveness. Keep them in a cool, dry place, away from direct sunlight. Use them regularly: Consistency is key when it comes to eye patches. Incorporate them into your skincare routine at least once or twice a week to see the best results. Over time, you'll notice a significant improvement in the appearance of your under-eye skin. Stay hydrated: Hydration is crucial for healthy-looking skin, including the under-eye area. Drink plenty of water throughout the day to keep your skin hydrated from within. Get enough sleep: Lack of sleep can contribute to the appearance of dark circles and puffiness. Aim for 7-8 hours of quality sleep each night to help your under-eye area look its best. Protect your skin: Sun exposure can accelerate skin aging, so make sure to protect your under-eye area with SPF-infused products or by wearing sunglasses when out in the sun. THE 10 BEST EYE PATCHES FOR EVERY SKIN CONCERNBEST BUDGET FRIENDLY  24K GOLD EYE MASK BEST FOR FINE LINES AND LIFTING  111SKIN CELESTIAL BLACK DIAMOND EYE MASK BEST FOR BRIGHTENING  DRMTLGY BRIGHTENING EYE MASKS BEST FOR HYDRATION  PTR HYALURONIC CLOUD HYDRA-GEL EYE PATCHES BEST FOR EARLY MORNING  GRACE&STELLA ENERGIZING EYE MASKS BEST FOR TIRED EYES 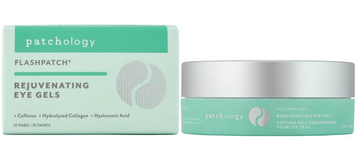 PATCHOLOGY REJUVENATING EYE GELS BEST SPLURGE 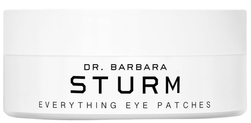 DR. BARBARA STÜRM EVERYTHING EYE PATCHES BEST FOR PUFFY EYES  MIZON CICALURONIC EYE GEL PATCH BEST OVERALL  ELEMIS PRO-COLLAGEN HYDRA-GEL EYE MASKS BEST FOR EXTREME DARK CIRCLES 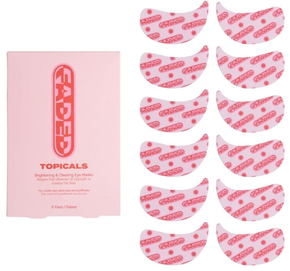 TOPICALS FADED BRIGHTENING UNDER EYE MASKS FINAL THOUGHTS Revitalizing your under-eye skin and boosting radiance is easier than ever with the help of eye patches. By choosing high-quality products that contain potent ingredients, you can address specific skincare concerns such as puffiness, dark circles, fine lines, and dryness. Incorporate eye patches into your skincare routine regularly, and with time, you'll notice a significant improvement in the appearance of your under-eye area. Say goodbye to tired-looking eyes and hello to youthful and radiant skin. Give your under-eye skin the pampering it deserves with eye patches and let your radiance shine through. Remember, when it comes to skincare, consistency is key. So, make eye patches a regular part of your routine and enjoy the transformative power they have to offer.  EYE CREAM: IS IT NECESSARY OR JUST A LUXURY? |